The Armorcast Reaver Titan
A few months ago I was lucky enough to score an Armorcast Reaver Titan on ebay on the cheap, but I have been holding off on working on the model- due to a lack of time. Following Adepticon, I have decided to work on the Reaver and begin making progress slowly but surely, with some new techniques and strategies that I had learned from the classes at Adepticon.
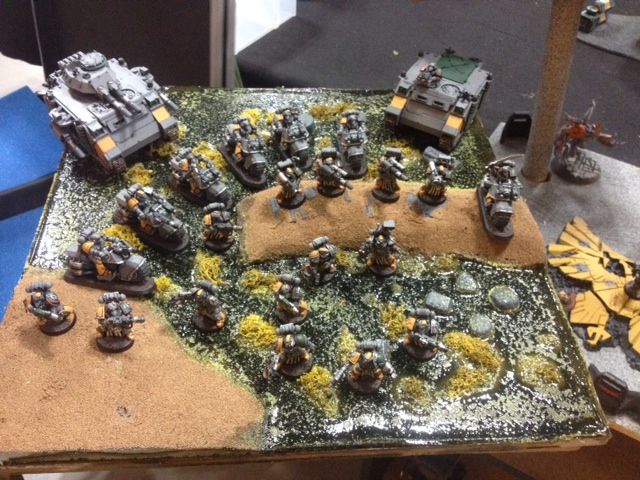
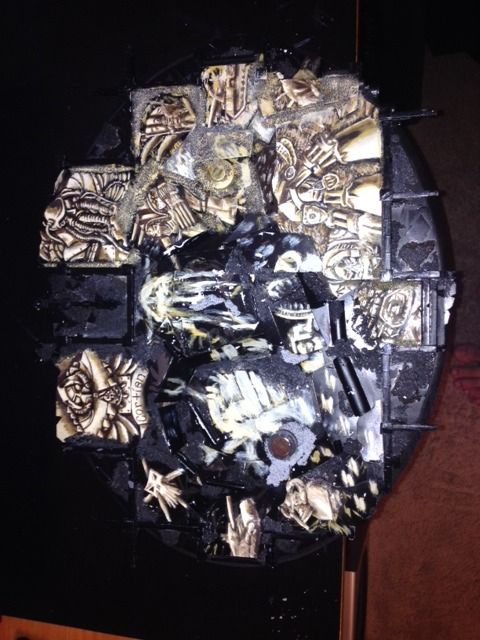
One of the two armies that I painted for a friend for Adepticon. He made the display board himself- which turned out GREAT! I was happy to see him having a great time with the army at the team tournament.
The Base:
The Armorcast Reaver is a little bit shorter than the current Forge World version. The FW Reaver is about sixteen inches tall; while the armorcast one is about 12. While this is not really a big deal; I wanted to bulk mine out to make it stand at about the same level of the FW version. I built a base (similar to the one I had for the Knight-Titan) to get that extra few inches. This means that my Reaver stands at a stately 15 inches now; with the later addition of a banner- it'll be about 16-17 inches.
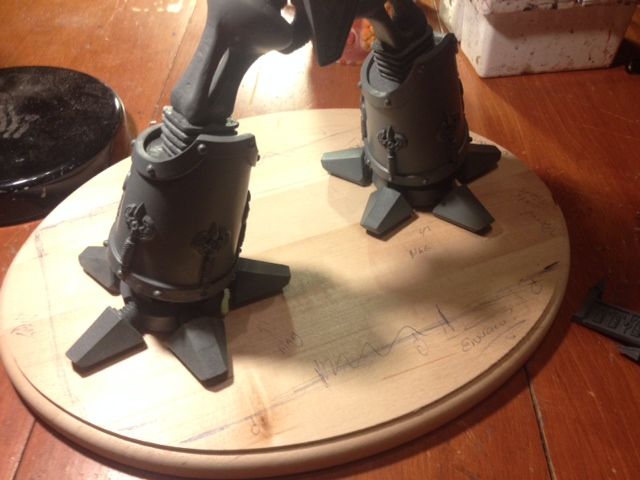
Mapping out the base (it's a good idea to map out the base before adding on any additional details and getting too invested.
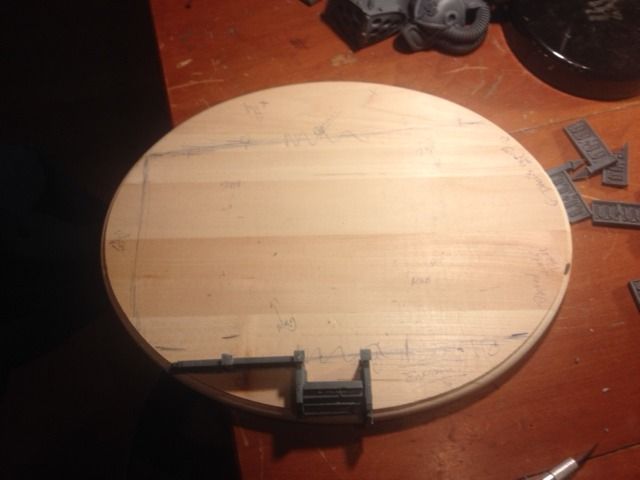
Once I have mapped out the general concept- I began the construction of the base.
I filled in the interior of the base with cork and a bit of sand and then placed a bit of plasticard over the top of it. I decided on painting freehand on the plasticard to make the base look more interesting. I also placed several BIG magnets on the base to keep the Titan anchored during games.
For the base I first blocked out the areas that I wanted to paint with the basic shapes (of Titans/ Gargants and Tanks) with colors- then went in afterwards to paint the details. Once these details were painted I used a micro-art pen to draw in specific details.

The finished freehand work on the base. I still have to paint the rusted piping, add a few more little details and of course add the static grass.
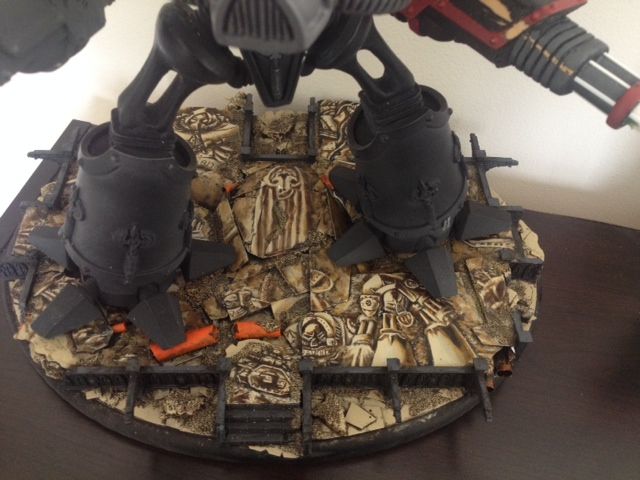
The Reaver Titan finally standing on the nearly finished base.
Painting Start:
For the paint scheme- I'm going with the Legio Metalica colors in NMM. I'm going to be painting the Reaver itself to closely match the old Epic Warhammer 40,000 models- where it has clean, bold colors. This is in stark contrast to the super-realistic style that I have seen a lot of Titans painted in recently. I figure that this will look great with the classic style of the model itself. The bold, clean lines will also contrast the Blanche-esc styled based (I copied parts of several Epic 40k battle scenes!).

The Titan stands (with my hobby commitment sign too boot!)
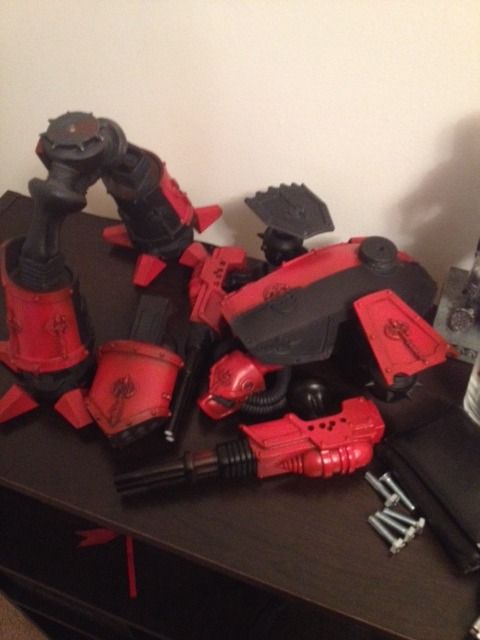
I base coated the model black with primer, followed by blocking out colors with army painter red primer. I did not want to use my airbrush just yet (still learning) and I found this technique with the army painter as very helpful to get the basic colors set before details.
So much time has been saved by masking and painting different colors with primer.
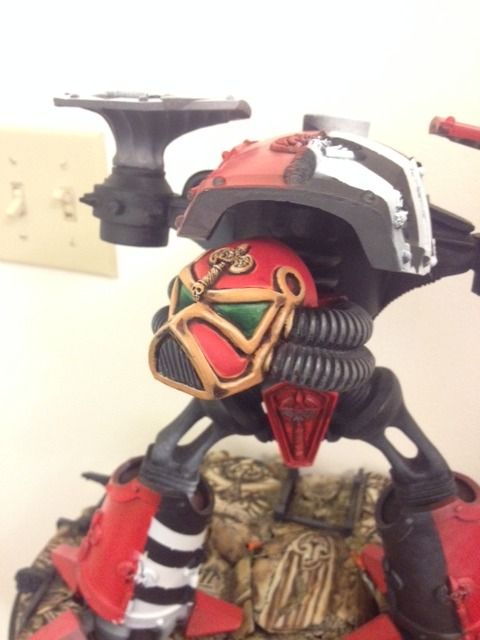
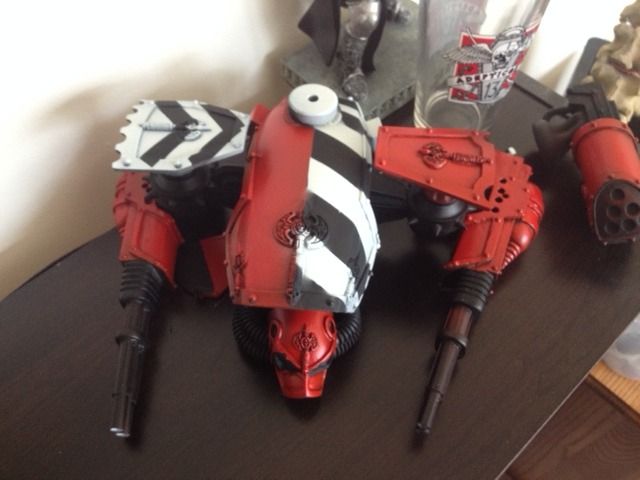
The first colors on the head are just about done.
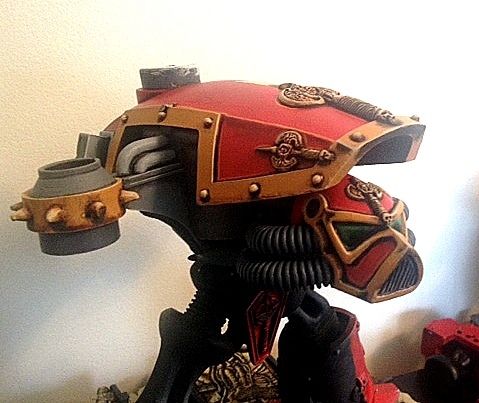
The head needed a few minor touch ups, but I'm really happy with how it came out. I tried a new technique with the eye lenses and I'm happy with how it turned out.
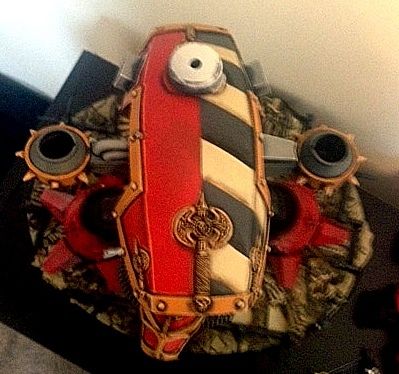
The top carapace piece. I went with the old Epic style with the large banding- however, I opted to use some minor shading that I had practiced with the Knight-Titan previously.
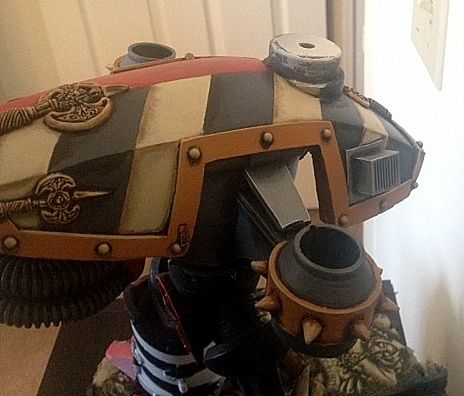
A side shot the banding. Painting a larger flat surface was a bit difficult and would have been nearly impossible if I didn't undercoat the model properly. That step SAVED me so much time.
Thank you all for your time and any suggestions/ advice with painting a huge model like this would be greatly appreciated!
-Skip
No comments:
Post a Comment